Publication date August 23, 2022
Hailey Beiber’s Glazed Donut Nails Have Been all over Tiktok, Here’s why
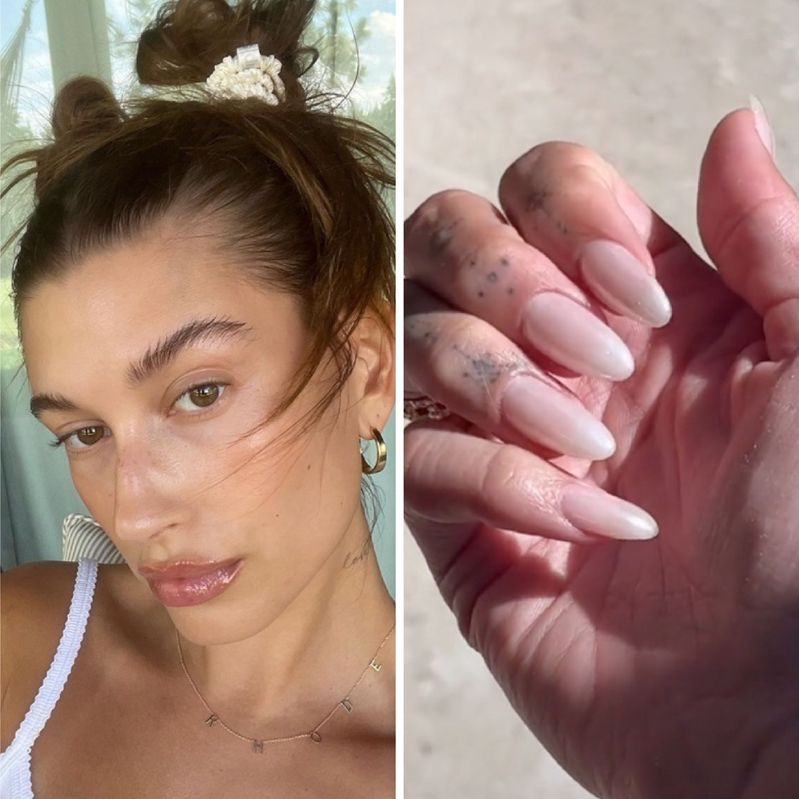
So often is the phrase "glazed donut" written next to the name of model Hailey Bieber that you'd think she was the one who came up with the idea. It started with "glazed donut skin," or a dewy complexion, using products from her new skincare line Rhode. Now, it's popular to have "glazed donut nails," which are nails with white polish and shimmering chrome. Who knew that a dish could be the start of an art movement?
What are donut-glazed nails?

Source: Hypebae
Recommended articles
Hailey Bieber asked Los Angeles-based nail artist Zola Ganzorigt to do her nails in a sheer white color before the Met Gala. This was the start of the nail style. Ganzorigt says that after they put on the color, she suggested to Hailey to try chrome powder on it because she thought that it might go with the YSL dress Bieber picked out to wear for the event.
Bieber first had a gel manicure with O.P.I. polishes and a chrome powder, which is a loose powder that is only sold to professional nail technicians and gives the polish a shimmery look. But as soon as Justin's girlfriend wore something, the internet went crazy trying to copy it. Ganzorigt posted a tutorial on TikTok to help her many fans learn how to do a manicure like hers. But there's no need to click away—the steps and products below will help you get the nails inspired by Justin Bieber that you've always wanted.
1. Get your nails ready for polish.
Like any good painting job, you'll need to prepare the canvas first. Ganzorigt says that prepping your nails before painting them is very important, and it makes your manicure last longer.
Wash your hands and use nail polish remover to take off any old polish. Soak your hands for a few minutes in a bowl of warm, soapy water. Next, use a wooden stick or a metal cuticle pusher to gently push back your cuticles, which are the thin layer of skin around the edge of your nail.
Then, use cuticle nippers to carefully cut away the extra skin. Take your time so you don't cut yourself by accident. Then, wipe the nail with rubbing alcohol or acetone-based nail polish remover on a cotton ball or round to get rid of any oil that could make the nail polish not stick well.
2. Put a base coat on your nails first.
Source: Seventeen magazine
Ganzorigt says that putting on a base coat is another part of getting ready. The base coat protects the nails and makes the manicure last longer. Gel polishes are used for Bieber's signature manicure, but if you want to do a regular manicure at home, Ganzorigt suggests putting on a layer of the O.P.I. Natural Nail Base Coat, which is supposed to keep nails shiny and chip-free for up to seven days.
3. Put on several coats of white polish
For the next step, you'll need O.P.I.'s "Funny Bunny" nail polish or any polish with a milky-white color and no shimmer. Ganzorigt says that if you put a thin layer of this on your nails, it will give them a sheer white colour. Let this layer dry for about three minutes so that the next layer of polish doesn't make the white less bright.
To get the best paint job, wipe the brush on the edge of the jar to get rid of any extra polish. If you use too much polish, you risk getting a blotchy finish. First, move the brush down the middle of your nail. Then, move it down each side, using long strokes from just above the cuticles to the tip. Use your orange stick or a cotton swab dipped in nail polish remover to wipe off any polish on your skin.
4. Use this trick to make sugar sparkle.
The O.P.I. Chrome Effects "Tin Man Can" nail powder that gives Bieber's nails their shiny look isn't available to the average nail fanatic, and powder is harder to apply. Ganzorigt recommends a method for achieving the look at home using common nail polish: Put one coat of the thinned-out mixture on your nails after mixing O.P.I.'s "Top Coat" with the shimmery white color "Kyoto Pearl" to make it more opaque.
Using the wooden or metal cuticle pusher, mix the polishes together on a clean surface, like a metal palette or a disposable plate (you can wipe either clean later with nail polish remover). Work with a few drops of each at a time so the polish doesn't dry out and get too thick. Use the brush from the shimmery color to pick up the mixed polish, and then use three strokes to paint it on your nails. Repeat the mixing and painting process for each nail, or every few nails if you still have enough mixed polish that hasn't dried out.
5. Let it dry

Source: FIZZY MAG
Once you're done with the polish and your nails have been set for at least 15 minutes—or however long it takes for them to feel dry to the touch—finish your manicure with cuticle oil and hand lotion to give your nail polish an extra layer of protection and soften your skin.
The Cuccio Naturale Revitalizing Cuticle Oil has a lot of good reviews on Amazon. It comes in scents like "milk and honey" and "lavender and chamomile," as well as a fragrance-free option for people with sensitive skin or noses. You can get it in a bottle with a dropper that holds 0.5 or 2.5 ounces. Put a drop of oil at the base of each nail and rub it into the skin around it.
And that is it, your own glazed-donut nails will rock your world.
Recommended articles


